Step by Step Guide to Laptop Keyboard Repair

Repairing laptop keyboards is not an easy task for people, even for those who are good at fixing computer keyboards. The main reason behind it is although they perform the same functions, they are built differently. If your laptop keyboard needs repairing, this article is for you. This article will guide you about everything regarding laptop keyboard repair.
Before discussing how to repair laptop keyboards, let’s see how to prevent the damages.
The Best Ways to Prevent Laptop Keyboard Problems
Laptop keyboards are fragile, and if you don’t take care of them, they can break easily. Here are some tips on making sure your laptop keyboard lasts for a long time.
- Avoid using a laptop in places with high humidity
- Keep the laptop away from liquids and moisture
- Don’t use your laptop in extreme temperatures (too hot or too cold)
- Turn off the laptop if it is not in use for more than four to five hours
Steps to Repair Your Laptop Keyboard at Home
If your laptop keyboard is broken, you can fix it yourself by following these simple steps of laptop keyboard repair:
Disconnect it From the Motherboard
The first step to repairing your laptop keyboard is to remove the screws and disconnect the keyboard cable from the motherboard.
To repair your laptop keyboard, part of the process is to remove the screws and disconnect the keyboard cable from the motherboard.
Many people don’t know how to do this, but it’s actually relatively easy. This process is essential because it will allow you to access your laptop’s internal components. For example, to disconnect your keyboard from the motherboard, first, remove screws on both sides of the laptop lid and lift the lid. After that, you will find some cables that are joining both of the components; disconnect them.
Dust of Your Keyboard
Once you disconnect the keyboard, now is the time to dust it. Dusting off a keyboard is one of the most tedious tasks, especially if you have a laptop. But if you want to keep your keyboard clean and dust-free, you can use a sheet of compressed air to remove any debris from the surface.
The process involves using a sheet of compressed air to blow away any dust or debris from the surface of your keyboard. This will make it easier for you to clean your keyboard without using a cloth or other materials that might leave behind particles that could get stuck in crevices and cause issues later on.
Clean the Keyboard’s Surface with a Soft Cloth and Keyboard Cleaners
After dusting, clean it with a soft cloth and isopropyl alcohol. If you don’t have it, you can also buy the special keyboard cleaning liquids from the market. Avoid using hard clothes and acidic chemicals to clean the keyboards as they could damage the circuits.
Sometimes your keyboards don’t need anything except cleaning. After carefully cleaning them, you should check whether they are operating well or if there is an issue with them.
Take out the Broken Keys of Your Keyboard and Carefully Replace Them
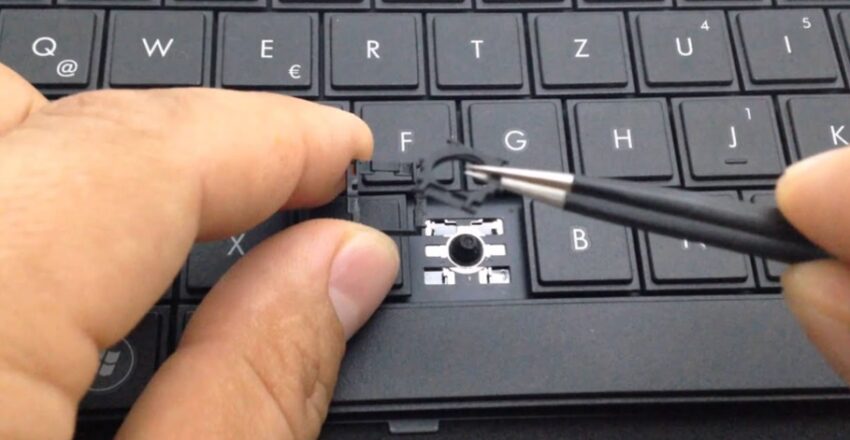
Take out each key and carefully check for any visible damage or defects in them. If you find any, go ahead and replace it with a new one by taking out a screw that is holding it in place on top of each key. After that, put back each key into its respective hole on top of the case, making sure that you put them incorrectly.
Reassemble and Reconnect the Keyboard
Once you are sure that everything is perfect, now is the time to reassemble and reconnect the keyboard. First, make sure that the wires are correctly connected. If you don’t attach them accurately, they will not work correctly, and you will have to open them again.
It is better to see the videos about reconnecting the laptop keyboards with the motherboards. That is how you will be able to reconnect it properly.
Hopefully, after reading this article, you will learn everything about laptop keyboard repair.


Leave a Reply